The Recipe
(Serves 1)
1/2l vegetable or chicken stock
olive oil
1 small onion, diced
2 garlic cloves, diced
150g tomatoes grated or chopped very fine
pinch of sugar
pinch of thyme
1 dl risotto rice
1/2 dl white wine
A handful of fresh basil, sliced in narrow strips
~1/2 dl grated Parmesan cheese
Bring the stock to simmer in a pot. You'll want it simmering before adding it to the rice to keep them cooking nicely.
Saute onion in a pan over high heat. Add rice and garlic and cook for a few minutes until the rice is crackling. Add grated tomatoes, sugar and thyme and cook until the rice is coated and the tomato juice is soaked up. Add wine and stir until it is absorbed.
Turn the heat down to medium-high to keep the stock from evaporating too quickly. Add the stock a ladle-full at a time and stir until it's absorbed. This will take at least 20 minutes. Start testing the rice after 20 minutes - you'll want a bit of a bite to it. If you run out of stock, just add boiling water instead.
Add the basil and cheese. Stir until the cheese has melted. Serve immediately.
The Verdict
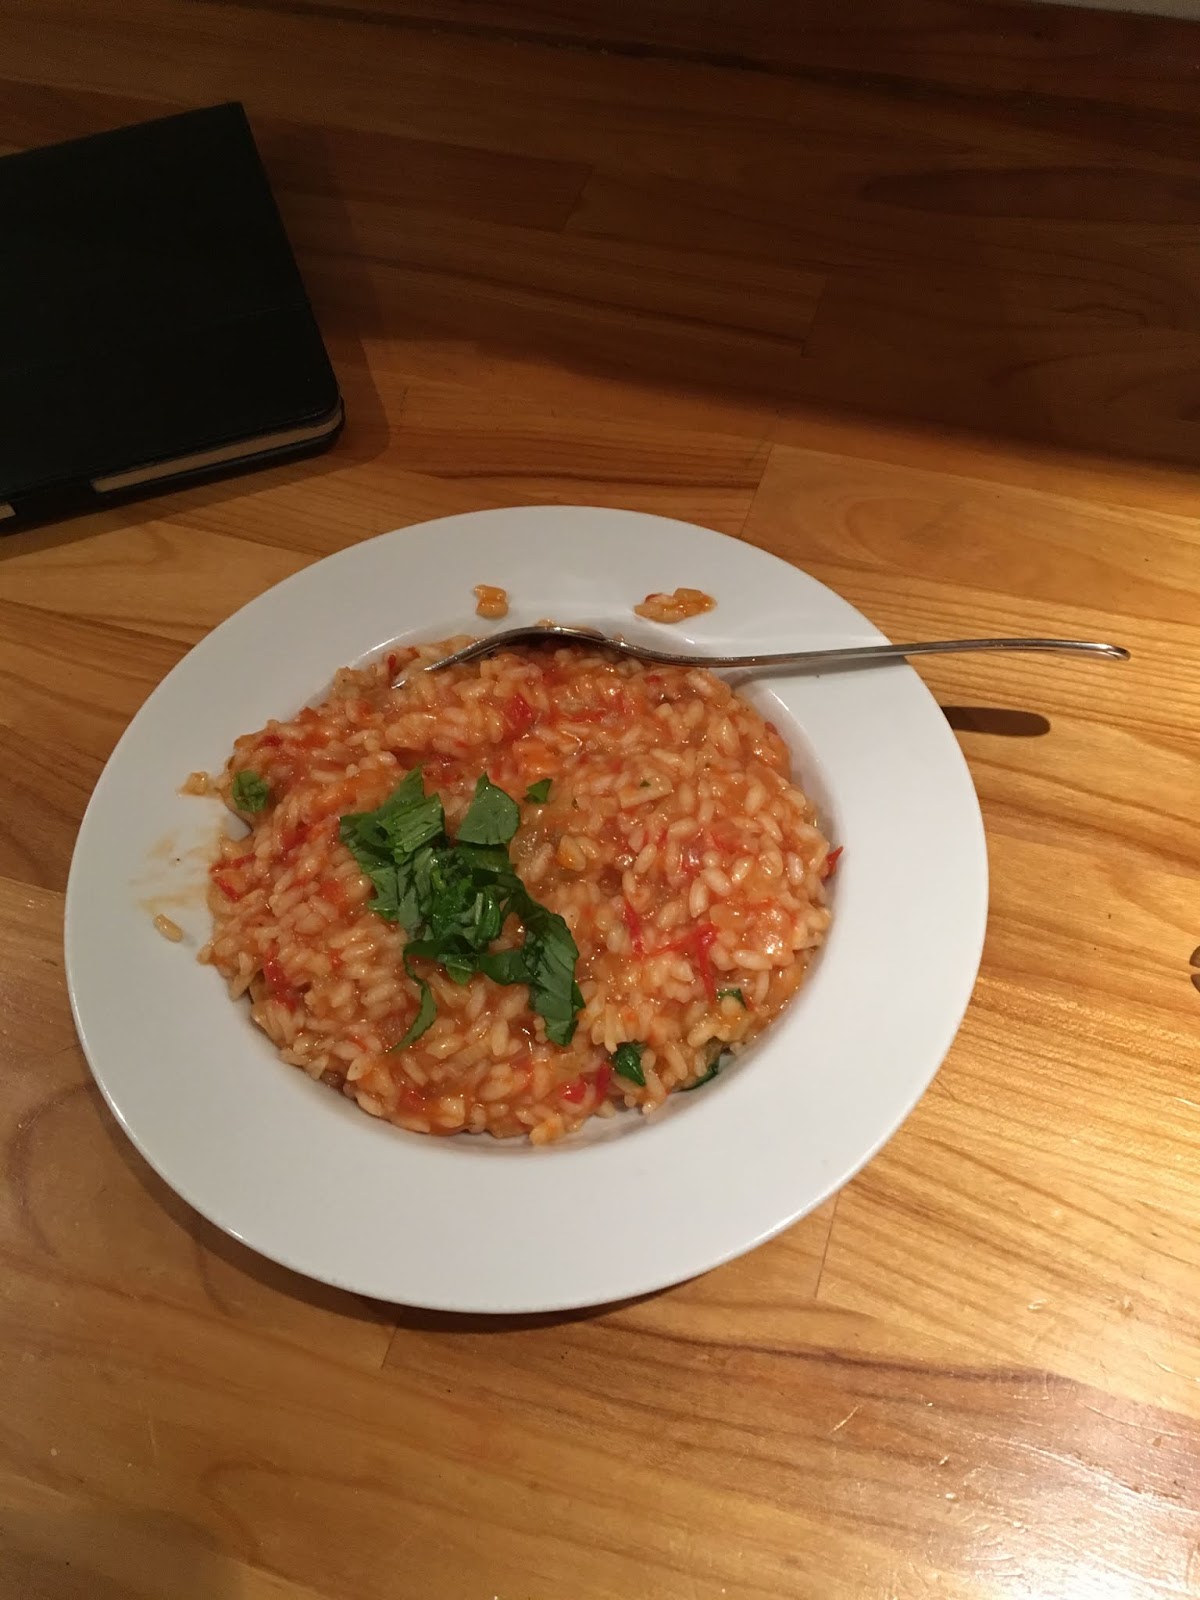
Also really good, but although just as tasty as the Mushroom Risotto I think this one works better as a starter than a main. It lacked the "umami" taste that the mushroom gave the other version. I'd want to add some meat next time, but am not entirely sure which would work best, so I'll have to try it out.
Showing posts with label misc. Show all posts
Monday, November 19, 2018
Friday, September 21, 2018
Week 38: Mushroom Risotto
The Recipe
(Serves 1)
1dl risotto / Arborio rice
3/4dl dry white wine
~5dl chicken or vegetable stock
1 small onion
1-2 cloves garlic
~100g mushrooms
Butter
3-4 tbsp grated Parmesan cheese
Fresh basil or parsley for garnish
NB: you cannot make risotto with any odd rice, as they won't get the right creamy texture. You can substitute pudding rice in a pinch, but it's worth getting the real thing
Chop mushrooms, onion and garlic. Bring the stock to a boil in a separate pot. Add extra spices if you want, but remember that everything will be boiled down and SUPER concentrated, so a little goes a loooong way.
Melt a bit of butter in a pan and roast the mushrooms until done. Add pepper to taste. No salt though! The stock will make it plenty salty enough. Once done, remove mushrooms from the pan.
Add saute the onion until fragrant. Turn the heat up to high and add garlic and rice. Toast them for 2-3 minutes while constantly stirring, to get the outside starch off and allow the rice to soak up the liquid better.
Pour in the wine while stirring. This will be absorbed quickly and once it's almost all gone, start pouring in the stock a little at a time. I did about 1dl at a time at first, going down to ½dl as I went on. Turn down the heat to where the rice is just simmering, to keep the outside from being done too quickly compared to the inside. Keep stirring between each addition of stock until it is absorbed. I used all 5dl for the 1dl rice, and it's possible I could even have added more! This will take awhile and you cannot leave it alone! So this is really a "for the love of cooking" dish. After about 20 minutes, start tasting the rice - wait for that magical al dente moment. If you run out of stock before the rice is done just add boiled water instead - you'll have added plenty of stock for taste by this time.
Once the rice is done add the cooked mushrooms, extra butter, parmesan cheese and basil/parsley. Stir until the butter and cheese has melted. Serve piping hot.
The Verdict
Oh, Yum!!! I absolutely love risotto (when done well, anyway), but this was my first attempt ever at making it myself. However, I'd been having a craving lately, so I let myself be inspired by MadLori's tumblr and gave it a shot. It wasn't perfect, but pretty darn close (you know it's good when you eat all alone and still exclaim "YUM" every 3-4 bites! 😄 ). I made this two days in a row to fiddle with the recipe and adjust the measurements.
I'll definitely be making this again! I also want to experiment with adding other things to it instead of the mushrooms.
Monday, September 10, 2018
Week 37: Texas Dry Rub
The Recipe
1 tbsp paprika
1 tbsp brown sugar
1/2 tbsp chili powder
1/2 tbsp sea salt
1/2 tbsp ground pepper
1 tsp garlic powder
1 tsp onion powder
1/2 tsp cumin
Mix everything together and rub on meat of your choice before cooking it. This amount fit ~900g chicken perfectly (4 breasts, each cut in halves). Can also be made in advance and stored in an airtight container.
The Verdict
Rather spicy, so if making this for people who don't deal well with heat, cut down on the chili to 1 tsp or less (or even leave it out completely). All the spices mesh together really well, so it would work just as well without/with less chili. Personally, I loved it though. Just the right amount of kick for my tastes. Now I want to try it with other types of meat as well! I served the chicken with the spicy penne from last week and the two dishes went really well together :)
Friday, March 17, 2017
Week 9: Croissant Rolls
The Recipe
2 cans refrigerated croissant rolls (the ones that make 6 rolls each)
1 bell pepper in slices
8-12 slices cheese (depending on the size)
150g mixed deli meats (I used a tapas mix with salami, dried ham and various other types)
Preheat the oven to 200C.
Unroll both cans of dough and separate into 6 rectangles. On a pie pan or pizza pan, arrange rectangles in ring so short sides of rectangles form a circle in center. (Dough will overlap)
Spread bell peppers toward center of ring on bottom halves of rectangles. Top with half of the cheese. Layer mixed meat over cheese. Cover with remaining half of cheese.
Bring top halves of rectangles over the filling and tuck the dough under bottom layer to secure it. If there's too much dough so the inner layer becomes too thick, rip some of it off and use to cover any wholes (some filling might still show - that's fine). Sprinkle with black pepper.
Bake 18 to 22 minutes or until dough is golden brown and thoroughly baked. Cool 5 to 10 minutes before cutting into serving slices. Serve with sweet chili sauce or salsa.
The Verdict
I missed out the "make sure the inner layer of dough doesn't become too thick" part the first time around, so some of it ended up a bit chewey. It's definitely more of a snack food than a meal, but I liked it and it was easy enough to make. Definitely might give it another shot for a tapas evening or similar.
Friday, November 15, 2013
Week 45: Stuffed Bell Peppers
The Recipe
70g thinly sliced roast beef
8 slices cheese
2 large bell peppers, halved lengthwise
1 large onion, thinly sliced
200-250g mushrooms, thinly sliced
2 tbs butter
2 tbs olive oil
2 clove garlic, minced
Salt and Pepper
1dl rice, precooked
Preheat oven to 200C. Boil the rice.
Saute onions and mushrooms over medium heat with butter, olive oil, minced garlic and a little salt and pepper. Saute until onions and mushroom are nice and caramelized. About 25-30 minutes.
Slice roast beef into thin strips (I found it easiest to cut them with scissors) and add to the onion/mushroom mixture. Allow to cook 5-10 minutes.
Line the inside of each pepper with a slice of cheese. Fill each pepper with meat mixture until they are nearly overflowing. Top each pepper with another slice of cheese.
Bake for 15-20 minutes until the cheese on top is golden brown.
The Verdict
I served this with garlic bread, which was fine, but another time I might try to cook a cup of rice and mix it with the onion/mushroom mixture - just to make for a more filling stuffing. Also, I think I'll add another onion and another clove of garlic... either that, or use a tiny bit less meat.
I tried making it again with more garlic, a larger onion and less meat and it turned out SO much better. I've updated the quantities in the recipe above so it reflects the new measurements.
I really liked it, and will definitely be making it again. I think it would work well with other types of meat as well. Easy to make and tasted great :)
70g thinly sliced roast beef
8 slices cheese
2 large bell peppers, halved lengthwise
1 large onion, thinly sliced
200-250g mushrooms, thinly sliced
2 tbs butter
2 tbs olive oil
2 clove garlic, minced
Salt and Pepper
1dl rice, precooked
Preheat oven to 200C. Boil the rice.
Saute onions and mushrooms over medium heat with butter, olive oil, minced garlic and a little salt and pepper. Saute until onions and mushroom are nice and caramelized. About 25-30 minutes.
Slice roast beef into thin strips (I found it easiest to cut them with scissors) and add to the onion/mushroom mixture. Allow to cook 5-10 minutes.
Line the inside of each pepper with a slice of cheese. Fill each pepper with meat mixture until they are nearly overflowing. Top each pepper with another slice of cheese.
Bake for 15-20 minutes until the cheese on top is golden brown.
The Verdict
I tried making it again with more garlic, a larger onion and less meat and it turned out SO much better. I've updated the quantities in the recipe above so it reflects the new measurements.
I really liked it, and will definitely be making it again. I think it would work well with other types of meat as well. Easy to make and tasted great :)
Monday, July 15, 2013
Week 29: Omelet with Tomatoes and Cheese
The Recipe
3 eggs
~1/2dl water (I eyeballed it)
1 large tomato
1 thin slice chili Gouda
Tabasco
Salt, Pepper
Butter
Crack the three eggs into a small bowl. Whip them to a frenzy - you really want to get some air into the batter. When you feel like you've whipped them sufficiently, add the water (or milk... I didn't have any though, so water it was) and whip them all over again. Add a couple of dashes of tabasco and salt and pepper to taste.
In a pan, melt butter over medium-high heat. Pour the batter into the pan and resist the urge to scramble them - scrambled eggs are delicious as well, but right now you're wanting an omelet :) Just let them cook on their own for 2-3 minutes.
Meanwhile, chop the tomatoes and cheese up into small pieces. Add them to the top of the omelet once the 2-3 minutes are up, and let it cook for another 2 minutes. Fold the omelet in half, covering up the toppings. After another 2 minutes it'll be done.
Serve with chili sauce if desired.
The Verdict
I definitely didn't use enough cheese! I'll probably take twice that next time. But that aside I loved it! It was my first attempt at making an omelet, and it turned out perfectly! :)
Thursday, February 28, 2013
Week 9: Sweet and Spicy Grilled Cheese
The Recipe
4 slices bread - the better the quality, the better the dish, but I just used toast bread and it was still fine.
2 slices sharp cheddar
2 slices spicy cheese
1 small onion, thinly sliced
1.5 tbsp butter
2 tbsp BBQ sauce
Melt 1/2 tbsp of butter in a skillet. Add the sliced onion and stir occasionally until color changes to slightly brown and taste is sweet, about 10 minutes. Remove onions from skillet and set aside.
Spread 1 tbsp of the remaining butter onto one side of each slice of bread. Divide BBQ sauce evenly among 2 of the slices, and spread evenly opposite the butter side. Lay cheddar cheese on top of sauce. Divide caramelized onion among the sandwiches, then top with pepper jack. Finish assembly by placing remaining bread slices on top. The butter sides of the bread should both be on the outside of the sandwiches.
Melt the remaining butter in the skillet on medium-low. Cook sandwiches two at a time, flipping when bread is golden brown on one side and cheese begins to melt. Serve while hot.
The Verdict
While I've had grilled cheese before, it's always been made in a toaster. This was the first time I tried it on the pan and it is SO much better!!! I tried not to think too much about the amount of butter that went into it though ;)
I couldn't find any spicy cheese nor any cheddar, so I used Havarti and added a bit of chili instead. Not enough though - I couldn't really taste the 'bite'. Also, the cheese really does need to be sharp. This was much too mild to give any proper taste. It was still delicious, but gave me an idea of what it could have been if I had stuck to the 'right' ingredients.
Very yummy and very easy. DEFINITELY something I'll be making again!
Monday, January 7, 2013
Fondue Dips
I made these for our NYE celebration, and they turned out really well :) I personally preferred the first one though.
Curry Dip
1/2 cup sour cream
Soy Sauce
Paprika
Curry
Oregano/Basil/Thyme mix
This one was made entirely to taste, so I have no idea how much I put in of the various spices.
Spicy Roast Garlic Dip
4 cloves garlic
2 tbsp butter
1/2 cup sour cream
Chili Paste
Lemon Juice
In a small frying pan on low heat, add butter and chopped garlic, cooking until browned. Once the garlic is done, add it into a bowl with sour cream and a few drops of chili paste (add as much or as little as you want, depending on your heat preference). Mix it all together with a spoon, mashing up the garlic as much as you can. Add lemon juice according to taste once it is thoroughly mixed.
Subscribe to:
Posts (Atom)


